In this blog post, I wanna talk about some nice open source software, that has helped me stay more organized. Most of the software is FOSS, in some cases, it is only OSS.
Find my device software
Before I installed GrapheneOS on my phone, I had the standard “find my device”-option enabled from Google, which allows you to track the location of your phone via a web interface, let it ring or lock it remotely. I almost never used it, but it was nice to know, that I still had options in case, I would ever loose my phone. But obviously, this has the big disadvantage of Google being able to track your location at any point.
So after I got rid of pretty much all of Google’s services in my life due to privacy concerns, my phone was untraceable by Google, but unfortunately also me. And of course, even though I never lost a phone before, I lost mine within a few months of installing GrapheneOS. I looked everywhere, but I couldn’t find it, so I had no choice other than buying a new one.
After that disaster, I knew that I needed a suitable alternative, because knowing myself, the chance that I would loose my phone again wasn’t small. But I wanted something private, which can be self hosted and is open source and end to end encrypted. Luckily for me, there is an excellent foss-project providing just this.
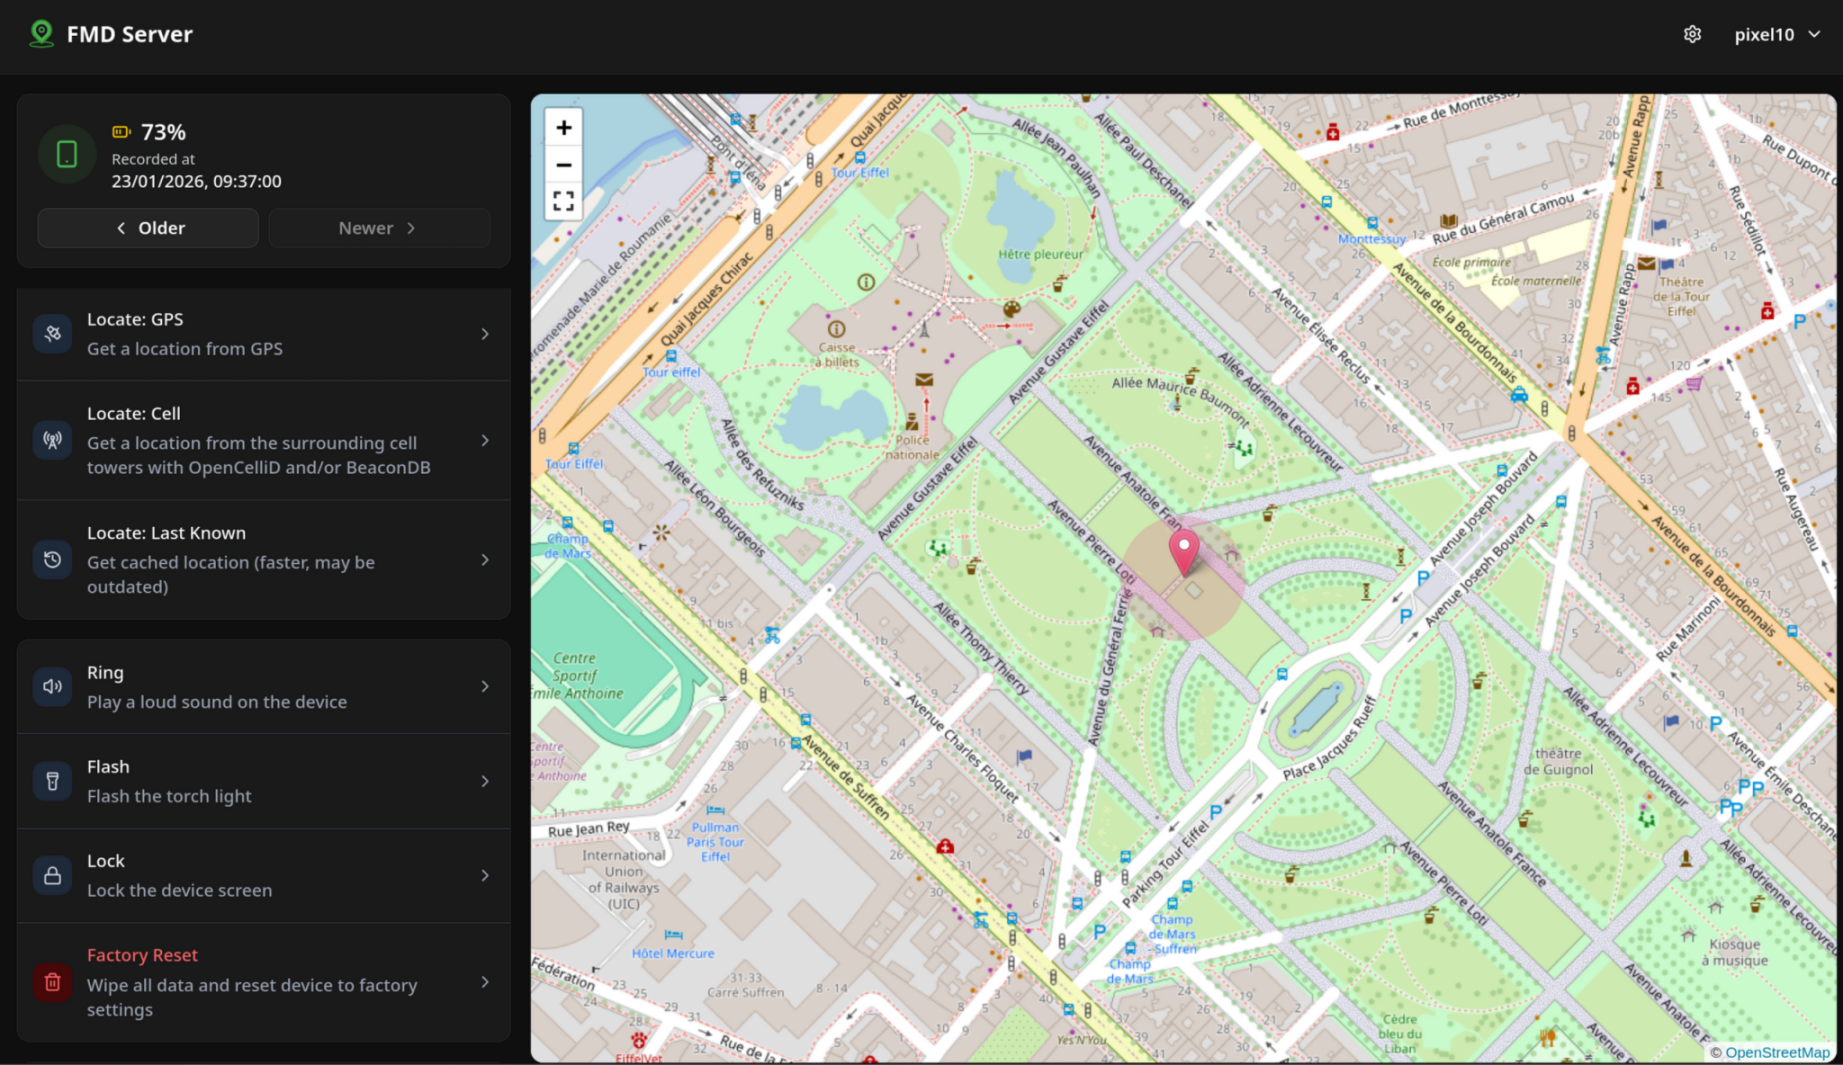
It’s called fmd (https://fmd-foss.org/) and can be easily deployed using a docker container. Here is my docker compose file, if anyone is interested (If you wanna deploy this yourself, I would suggest removing the networks-part, but that’s how I expose it to my reverse proxy tunnel).
services:
    fmd:
        container_name: fmd
        ports:
         - "8060:8080"
        volumes:
            - 'data:/var/lib/fmd-server/db/'
        restart: always
        networks:
          cloudflareCommunicate:
            ipv4_address: 172.20.0.67
          default:
networks:
  cloudflareCommunicate:
    external: true
    name: cloudflareCommunicate
volumes:
  data:
The cool thing about this software is that it is not only open source, end to end encrypted and so on, it can also do a lot more than Googles version. The server interacts with the phone using simple commands, like fmd locate to get the current location of the device, or fmd ring to let it ring. These commands cannot only be issued by the server, but can also be sent from any messaging service, like Signal, WhatsApp or even SMS. To authenticate, you can either add trusted phone numbers or create a code, that has to be sent together with the command. This means, that you can even locate your phone, when you have no internet. You could still locate your phone, if you can receive SMS , or if wanna get really fancy with it maybe via something like Meshtastic.
It also has some useful commands, that aren’t possible with Googles find my phone, here are some of my favorites:
- Taking a photo with the front- or back camera: This could be really useful, if you know where your phone is approximately, but wanna locate it within a single building. Or maybe if you’ve been robbed and wanna get a picture of the thief.
- Deleting all data: You can also do a full factory reset of your phone and wipe all data, in case it has been stolen or taken by the police and you want to protect your personal data
- Flashing the flashlight: A nice way to find your phone in the dark
I also set it up, so that it uploads an updated location every hour to my server in case I loose it and only notice it after the battery has depleted.
So hopefully, this will help me next time I loose my phone. And I still haven’t given up my privacy for it.
Document-Organisation
If anyone hands me a paper document, I pretty much expect to not know where it it within a few weeks. It gets lost in some drawer, folder or ends up in such bad condition, that I decide to throw it away.
The solution I found for this problem was just not having any physical documents. I now scan everything important with FairScan, which can be installed via F-Droid or Google Play. This app let’s me capture multi-page documents via the phone camera. The app automatically crops the document, adjusts perspective and contrast, so the process is quite quick and produces good results, if you have appropriate lighting conditions.
To produce the best results, try to look at the document orthogonaly and avoid casting a shadow with your phone. The document should fill as big of an area of the camera view while not being blurry. It is really important, that every part of the page is lit equally and the page is not crumpled.
FairScan is setup, so that it saves documents, which I scanned in a folder, that gets synced via Syncthing to my PC.
On my desktop, I upload it to paperless-ngx, which is an excellent self-hosted digital document archival system. You can categorize your documents with types, tags, and other metadata like creation date. The documents are also automatically scanned through using an OCR. So as long as they’re not handwritten, you can copy from them or even search for them using their contents.
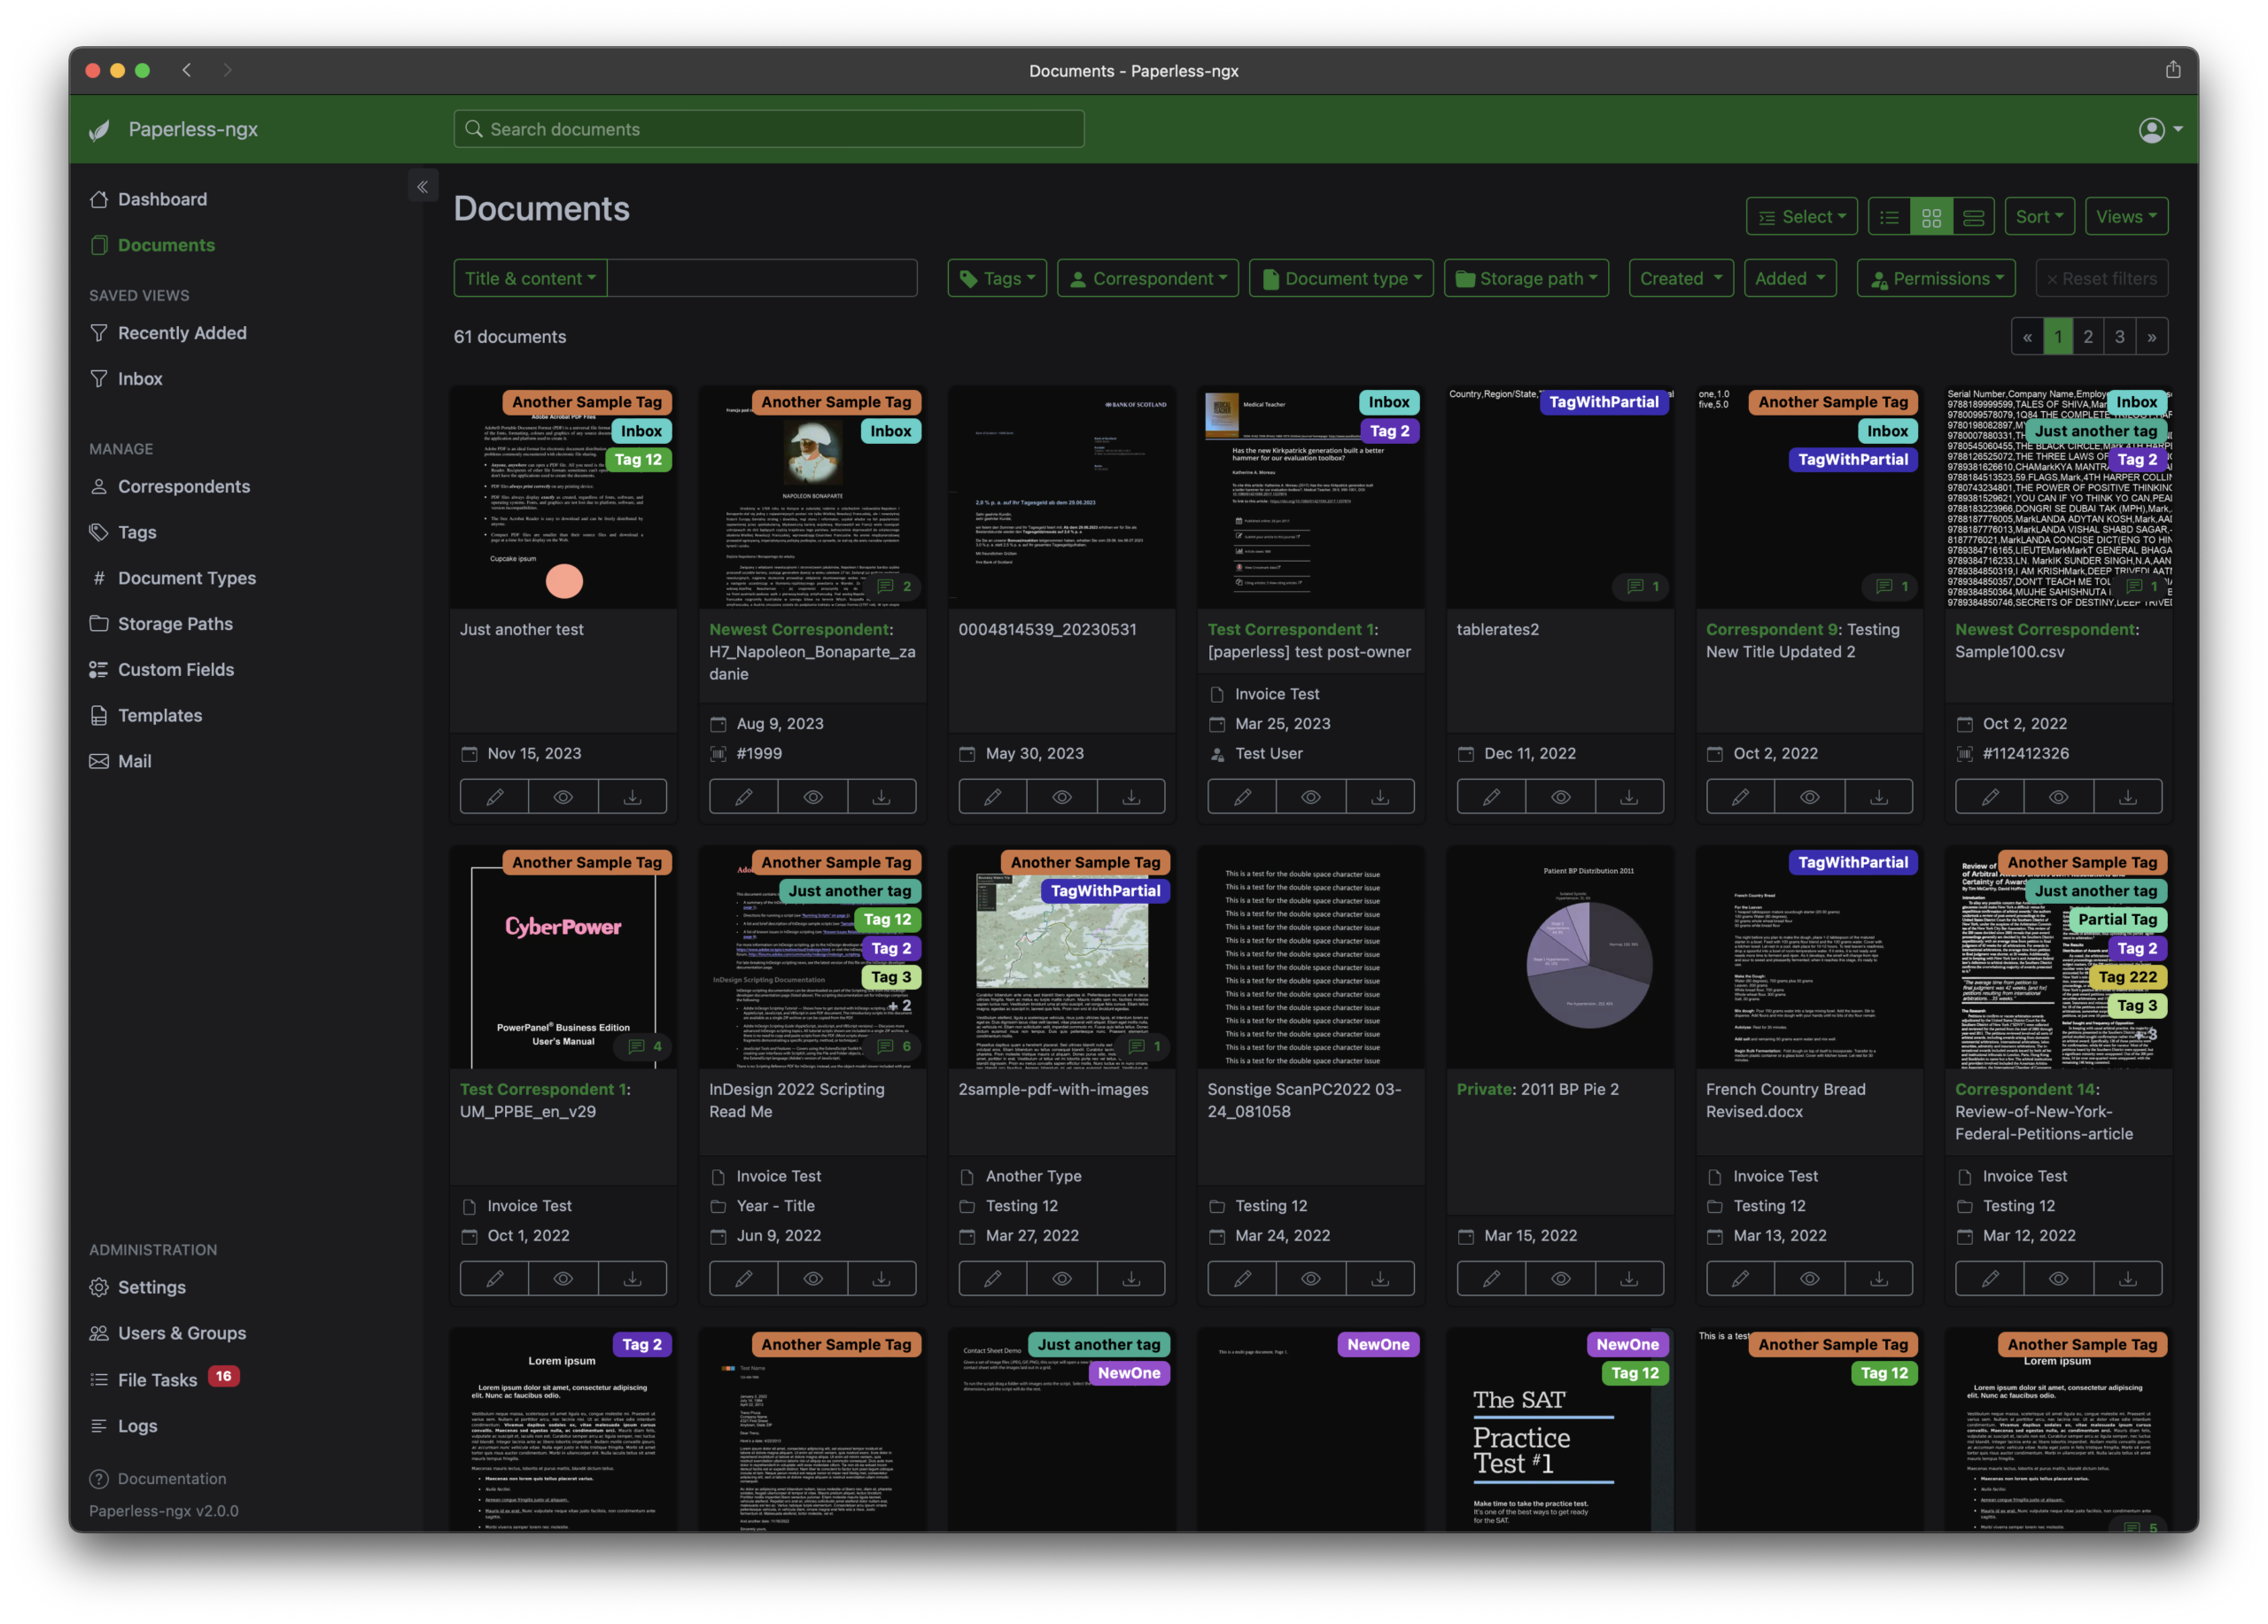
The best thing about paperless-ngx in my onion is the high degree of automation. It can extract the creation date from the document, if it’s written somewhere on it. Over time, it also learns your own tagging / categorization system and it gets progressively better at automatically applying all that metadata to your documents. So at this point, I only have to upload my document and paperless does the rest. After it’s finished, I just check if it got everything right.
I also set it up to auto-import document from my e-mail, so I automatically get a lot of invoices imported and categorized. It can however only auto import documents, that are directly attached to e-mails, so this doesn’t work if the website just sends you a link to download your invoice.
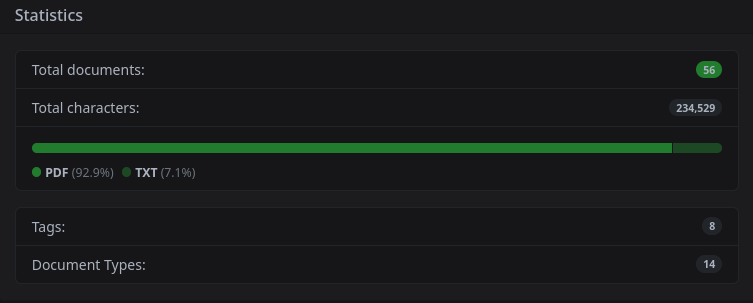
It’s also pretty cool, that you get some stats about your documents, on the right side you can see my current stats.
The only bigger issue that I have with this is that it mainly supports pdfs, so if you want to import .odt files for example, you need to install a lot of extra software. That seemed pretty complicated in the guide I discovered about this, so I haven’t had the motivation to set it up yet.
Budgeting
I used to not care too much about where my money went, because I still live with my parents, where I didn’t have any “important” costs, I had to cover with my personal money. But this year, I am saving up for a road trip with my friends, which is really expensive, because we are renting a camper-van for 3 weeks. So I have to spend my money wisely until then.
That’s why I installed ActualBudget on my homeserver. It allows you to categorize your transactions using certain metadata.
The transactions can be inputted manually, or imported from your bank as a file. I use .csv files for this, because that is easy to export from the website of my bank. You can also auto-sync your bank transactions with ActualBudget, but this requires an account with a commercial, third-party API with full access to your banking transactions, so no thank you.
A small problem with this system is that transactions are pretty hard to track, when you use cash. You can however split up transactions in ActualBudget manually. But I don’t think, that that’s worth the effort for me.
The most important metadata, which you have to assign yourself is the category of the transaction. Most of the other metadata gets imported automatically. You can assign these categories manually or using rules, like “if the payee is a certain person and the amount is over a certain threshold, then assign this category”.
If all your transactions are categorized, you can see an overview of each month, how much you spent on each category and what your income was. You can also assign an individual budget to categories or groups of categories.
In the reports tab, you see a big wall of different stats by default, which can be completely customized and you can even create your own widgets.
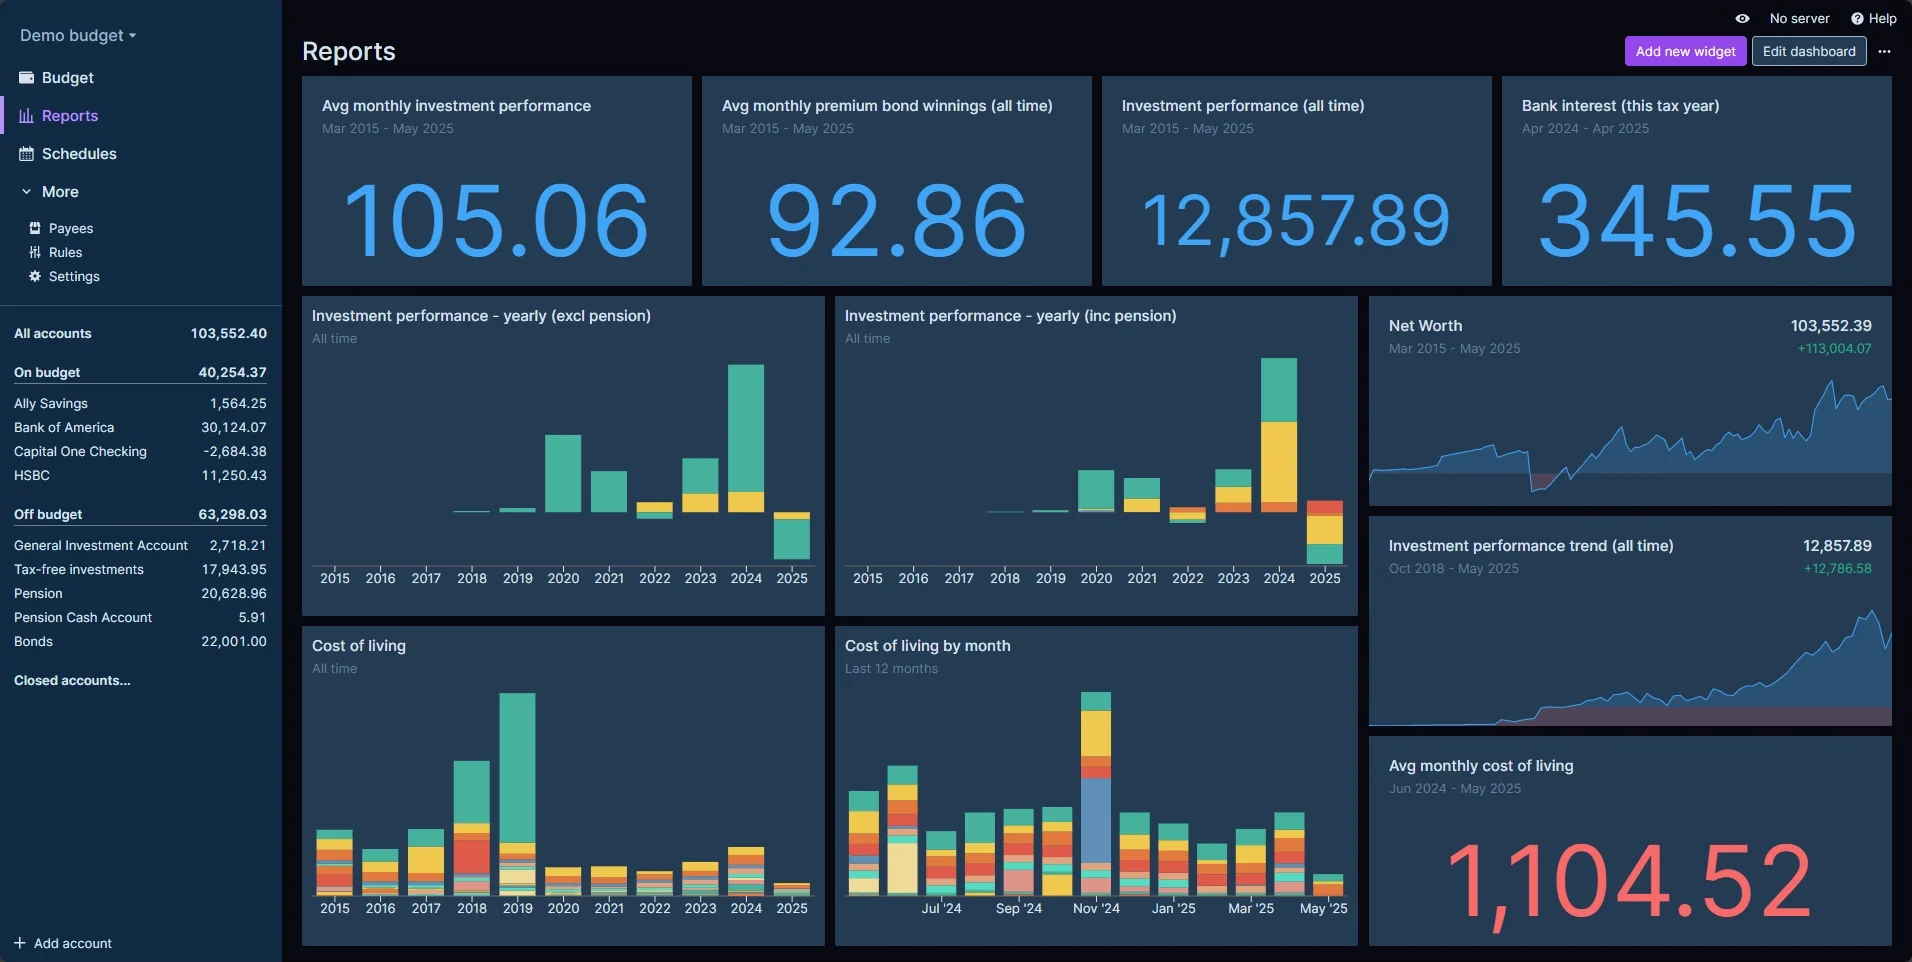
Basically, how I think of this software is just of a big database, which I can modify automatically and that lets me grab any data I want and visualize it in a useful way.
I haven’t used this for long, so I can’t be sure, how effective this is for regulating my spending. But I have a feeling it might not be as effective as I thouht, because I have recently bought this cute Plushtodon in an impulse, even though I couldn’t really afford it.
It was however really effective in helping me understand better, where I spend my money. For example, I found out, that I spend a lot more on dvds and bluerays than I thought.

Conclusion
Nowadays there seems to be a self hosted foss app for everything. Experimenting with this stuff is really great and I will see, what I actually stick with. I hope, that I gave you some ideas on what you could try yourself.
Other than that, have a great rest of your day 😉
Hi, good job on the blog. Keep it up!
probably going to use all of these on my homelab, thanks for the writeup! found you through lemmy 🙂